Installing MUP on Ubuntu
When I first converted my Acer Chromebook to a Linux laptop, I installed Fedora. However, as good as it was, I had my share of probems when I tried to install mup.
Fedora uses the rpm package manager and does not work very well if there are dependencies that need to be installed from third party applications. When I tried to install Mup, I ran into that problem and it took me many hours to finally get them installed and have the program up and running. After about a year of using Fedora I decided to remove it and install a Debian based distribution. For this I chose Ubuntu.
When I compared Ubuntu with the other heavy weight Debian based players, It stood out as the best. Ubuntu has Gnome as the desktop and it gave me the ability to use the desktop like I do with my Apple computer. This was not doable with Fedora basic install. Another great thing about Gnome is that this desktop manger allows me to connect to my Google drive easily. It did gobble up more of my available drive space, but it has left with about 4 gigs to play with. Since I will only be using it for Mup hymn work, this is more than enough.
This post is mainly for my benefit so that I can remember what I did. If you are installing Mup this should help you out.
Installing Mup
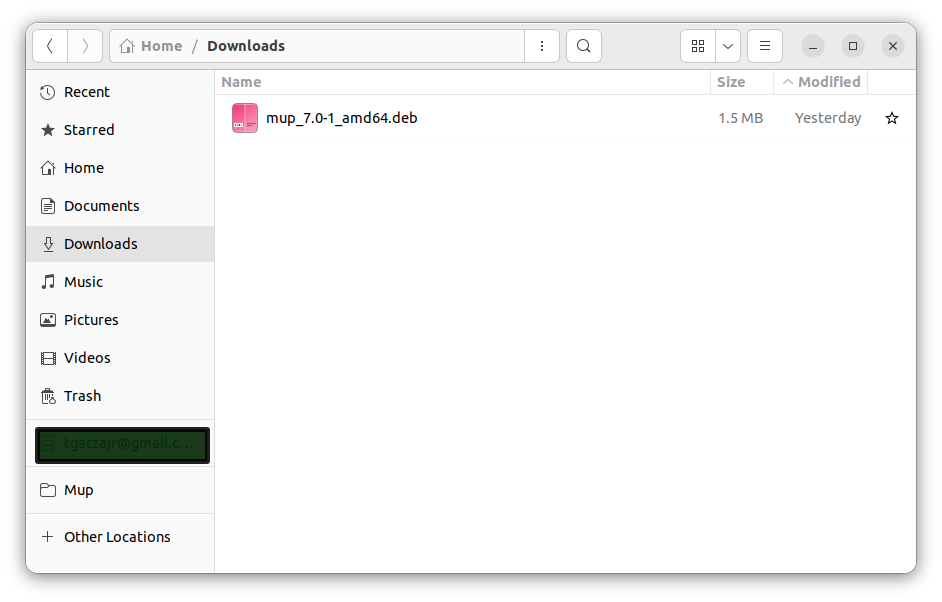
The first thing you need to do is to download Mup from the Arkkra.com website. For Ubuntu, be sure to select the .deb file. It is easily found by following the download link on the website's home page Next go to the download directory and right click on the Mup.deb file and select archive manager.
 Select the second option, the package manager. As it begins to install it will show the required dependencies. Click enter to install them. After it is completed Mup should run from the terminal command line.
Creating A Desktop Launcher
Open your text editor and copy and paste the following information.
[Desktop Entry]
Encoding=UTF-8
Version=1.0
Type=Application
Terminal=false
Exec=/usr/bin/mupmate %u
Name=MupMate
Icon=/usr/share/pixmaps/mup/mup32.xpm
(Note: You will need to add the %u at the end of the Exec=/usr/bin/mupmate). This allows the right click on the file to select Mup as the associated app to use.)
 You will then save this as a text file on your desktop and name it "MupMate.desktop".
Next right click on this file and select allow launching. You should now be able to start Mupmate.
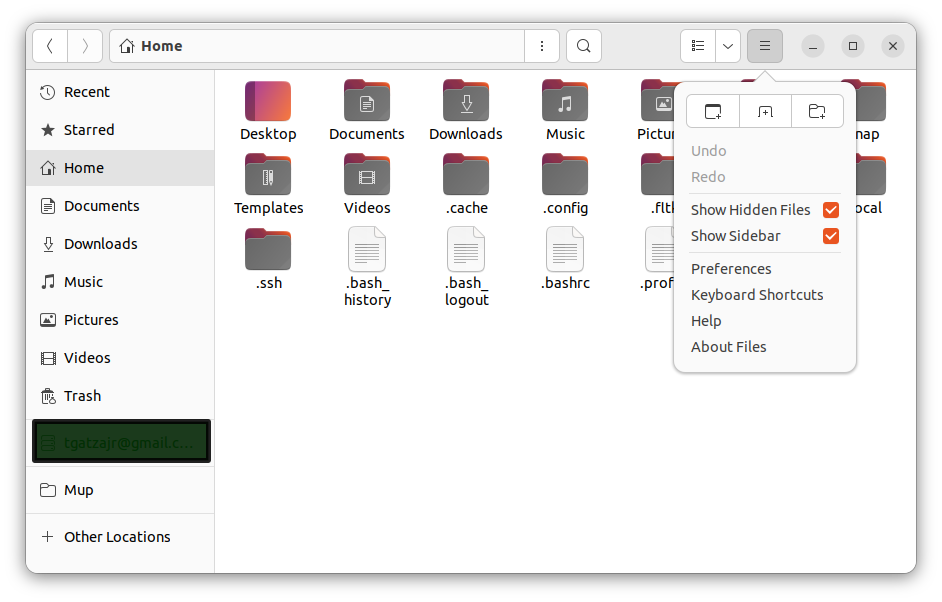
Next we will copy this file to the applications folder were it will show up with all your other applications. To do this open your file manager to your home directory. You will need tell the file manager to view hidden files. This is done by clicking the button with the three lines and checking the box next to "view hidden files".
 Next navigate to the applications folder. Click the folders ./local/share/application.
Next drag or copy the MupMate.desktop file from your desktop into the applications folder.
 You should now see it listed in your applications. If you want to add it to your docking bar, go to your applications and right click on the icon and select add to favorites.
That's it. Next you will need to configure MupMate for folders and application to view postcript files and play the midis.
Mup File Locations
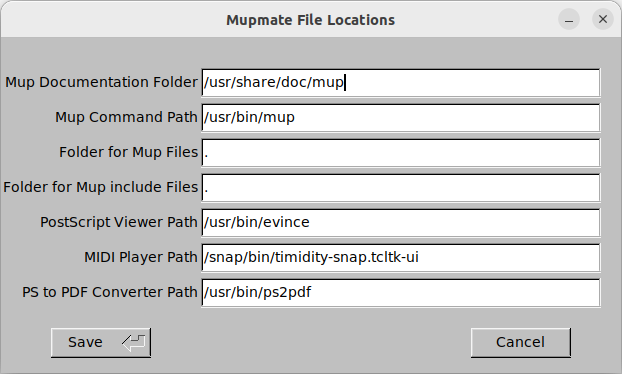
The final thing I had to do was set the MupMate file locations. The Ubuntu default postscript viewer is evince. So I set the path to "/usr/bin/evince".
Next I had to install Timidity-snap from the Ubuntu software center. Once that was done I set the path to the midi player path to "/snap/bin/timidity-snap.tcltk-ui" and saved the configuration. If all is well then it will close without errors.
 This is all that should be needed to get mup up and running.
Hope this helps anyone who is trying to install mup on Ubuntu!
Post by jgat
Retired with too much to do!